การตั้งค่า Arduino IDE เพื่อใช้งานกับ NodeMCU ESP-12E Development Board V2
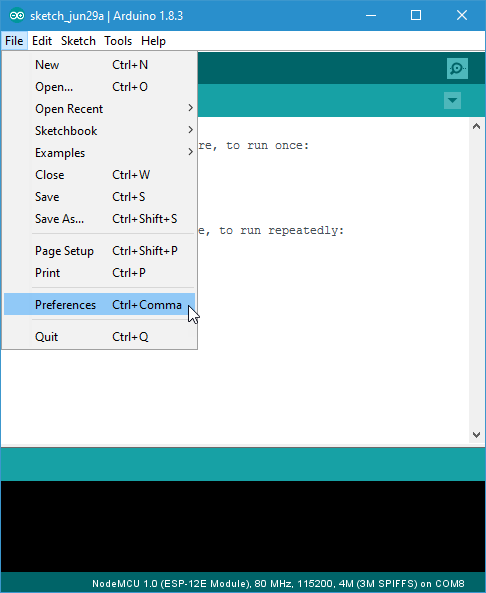
1.ดับเบิลคลิ๊กเพื่อเปิด Arduino แล้วไปที่เมนู File เลือก Preferences

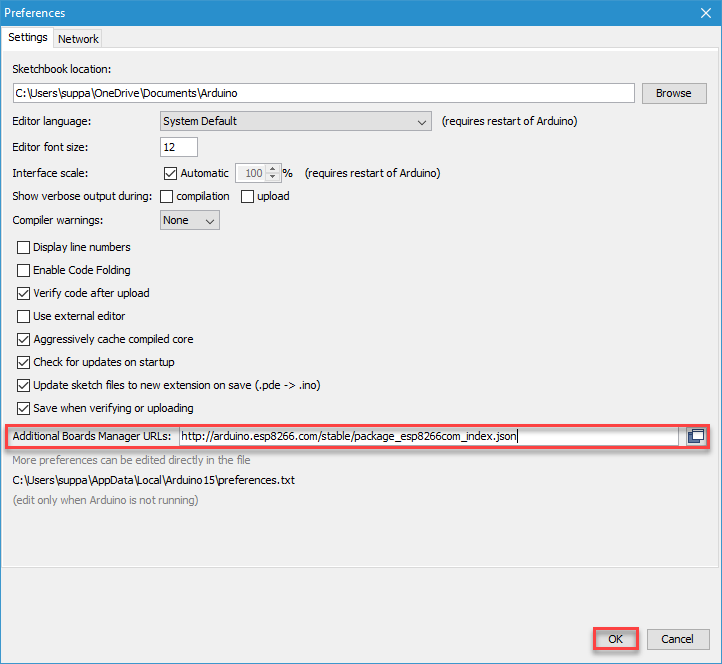
2.ในหน้าต่าง Preferences คัดลอก URL http://arduino.esp8266.com/stable/package_esp8266com_index.json ไปวางไว้ใน Additional Boards Manager URLs: แล้วกดปุ่ม OK
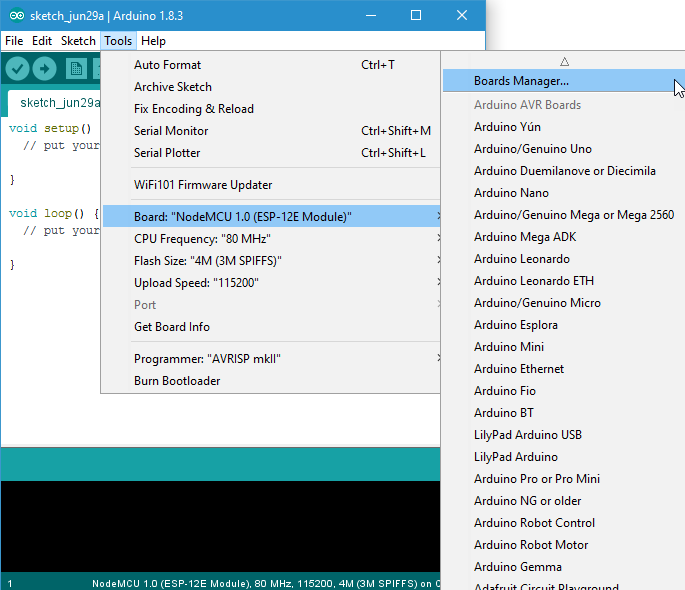
3.ไปที่เมนู Tool แล้วไปที่Board: “xxxxxx” เลือก Boards Manager…
4.ในหน้าต่าง Boards Manager เลือก Type เป็น Contributed
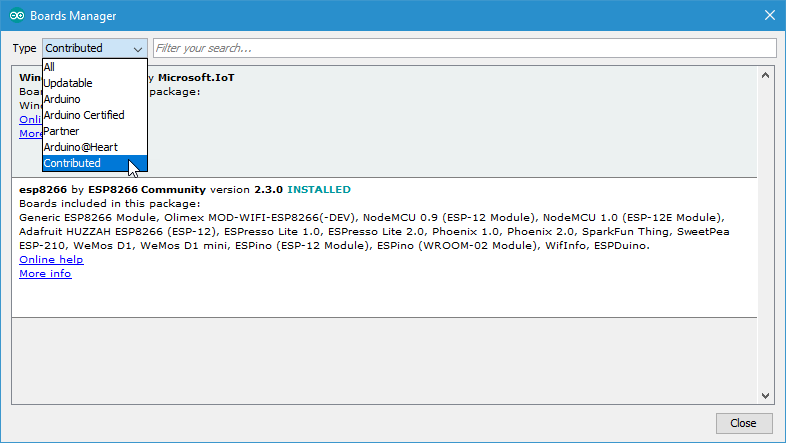
5.ไปที่ esp8266 by ESP8266 Community และกด Install
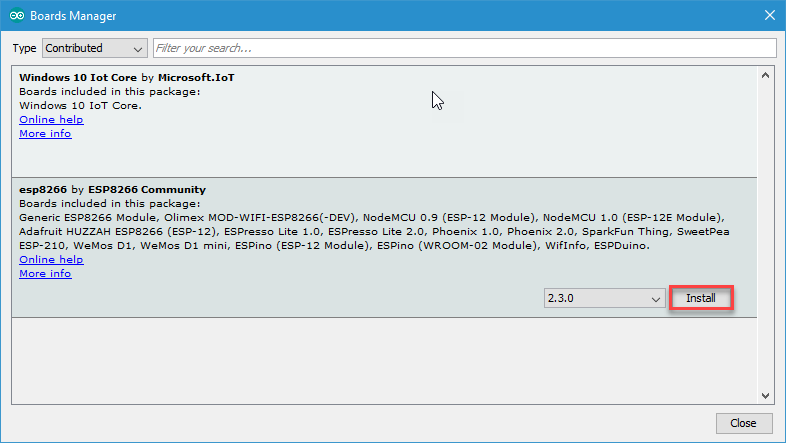
6.รอจนติดตั้งเสร็จ แล้วจึงกดปุ่ม Close

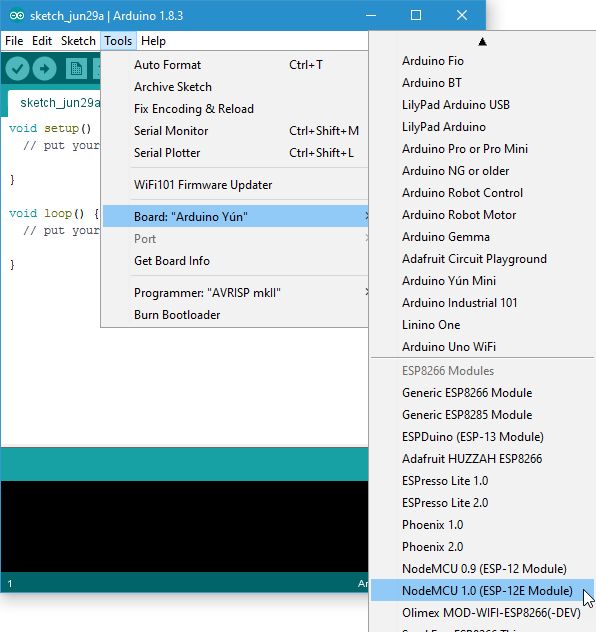
7.ไปที่เมนู Tool แล้วไปที่ Board: “xxxxxx” อีกครั้ง เลือก NodeMCU 1.0 (ESP-12E Module)
เพียงเท่านี้ Arduino IDE ก็สามารถใช้งานกับ NodeMCU ESP-12E Development Board V2
